Knowing how to clay bar a car is one of those things a detailing enthusiast takes real pride in. It can be time-consuming but it’s not overly difficult if you approach it the right way.
Whether you’re an experienced detailer or a weekend warrior, if you’re passionate about detailing and want that perfect finish, then knowing how to use a clay bar will help you turn your car into a masterpiece.
What Is a Clay Bar?
A clay bar is made of synthetic putty. Tacky, sticky, flexible, and durable, it’s designed to pick up the maximum amount of micro dirt (bits of iron, dust and dirt) from your car – bits that are too tiny to remove using standard cleaning techniques.
How to Use a Clay Bar
While clay bars are made from a non-abrasive material, this doesn’t mean they glide smoothly across your car by themselves. You should definitely invest in a clay bar lubricant too – and, when we say lubricant, we mean a proper specialised lubricant. Don’t rely on water!
Without proper lube you will create marring marks in your paint/lacquer. Marring marks are those slight imperfections you can put in while clay barring, this means more correcting work when you get to the polishing stage later.
A proper lubricant will prevent the clay bar from juddering and causing these marring marks (making the process easier) and help avoid scratches too. It’s worth the purchase!

How to Clay Bar a Car
Once you’ve got your clay bar and lubricant sorted, this is how to use it:
Step 1: Clean Your Car
Ensure your car is thoroughly cleaned and decontaminated before getting started. Don’t just blast it with snow foam, use fallout remover and tar dissolver, as well as a contact wash. This will help to avoid clogging up the clay bar with too much dirt. Trust us, it’s worth it.
Step 2: Prep Your Clay Bar
Remove the clay bar from the packet. Make sure you keep the wrapper and place the bar on top of it to ensure it doesn’t pick up any dirt. Next, tear the clay bar into 2 pieces and knead one half in your hands to warm it up. This will make it more useable, malleable and tactile. Leave the other half in the packet to avoid contamination of the bar.
Step 3: Lubricate Your Paintwork
Working on a small section at a time, spray the paintwork liberally with the clay bar lubricant. This will help the bar glide easily over your bodywork. Make sure the surface is always lubricated.
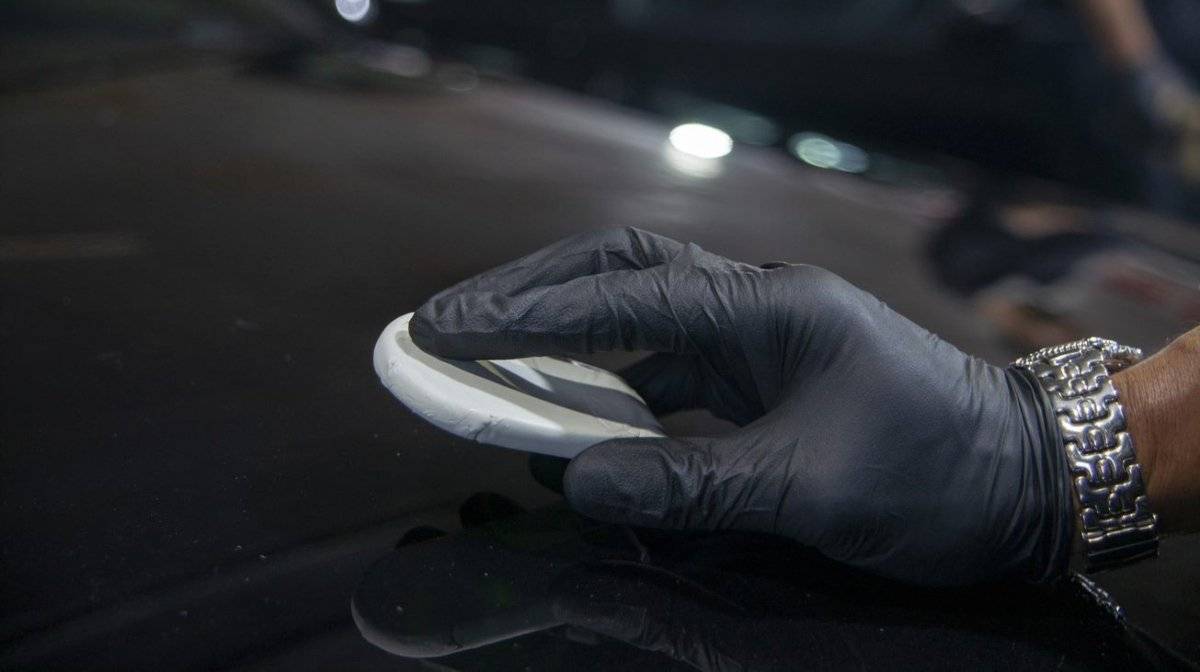
Step 4: Use the Clay Bar
With light pressure, slide the clay bar across the bodywork in straight lines, until the entire car’s surface is smooth to the touch. Wipe the car panel down with a microfibre cloth before continuing with the next section.
Detailer's Tip: Alternatively instead of wiping the paint down afterwards with a microfibre, pressure wash the area and towel dry instead. This saves time as the vehicle is now prepped for polish.
Be sure to flip the clay bar over once it has dirtied and appears full of contaminants (like small iron filings) and use the clean side. Continuing to use the dirty side will; drag removed dirt around the car, and also cause the clay to become less effective as the dirt is locked in preventing the clay bar from achieving maximum effectivity.
Step 5: Repeat Steps 3 & 4 as Needed
You can check if any spots need re-treating by applying some lubricant and running your hand over the surface.
Step 6: Wax & Polish
Move on to waxing and polishing. Don’t wax or polish before using a clay bar or you could drive the dirt on your car deeper into the paintwork and potentially cause scratches. Just don’t do it.
Is Using A Clay Bar Even Worth It?
We’ll be straight with you, from a visual perspective, don’t expect a Cinderella level transformation here. Clay bars don’t work that way. But you’re here to learn about detailing and detailing is all about the little things.
Clay bars help to make your paintwork feel super smooth – even a freshly clean car will feel rough by comparison.
Smooth paint provides a flat surface, which allows wax to better adhere to it. With better adherence comes better shine, longer-lasting protection, and a more comprehensive layer. This should leave your car cleaner and shinier for much longer. Like we said, it’s all about the little things.

How Often Should You Clay Bar Your Car?
Only use a clay bar before a polish, full wax or ceramic application. We recommend doing this every 6 months to keep your car protected.
Useful Clay Bar Tips
- Never pick up a clay bar from the floor, no matter how clean you think it is. The clay bar’s stickiness means it will pick up any dirt from the floor, which, if you use it, will scratch your paintwork.
- Tear half of the clay bar off. As the clay bar is super sticky, it can easily become contaminated by dirt from elsewhere. To help avoid your investment going down the drain because of your butterfingers, we recommend splitting the clay in two, so you have a spare one ready to go.
- Wear gloves. Wearing gloves ensures that none of the dirt on the bar gets on your hands.
- Only use a clay bar once. Each time you use a clay bar, it should be fresh to help avoid scratching and swirling.
Knowing how to clay bar a car and making sure you do it twice a year is an investment in your vehicle. It’s worth putting that time in to protect your car’s paintwork long-term.